Tools and Supplies Needed
- Tape Measure
- Pencil
- Miter Saw
- Drill
- Brad Nail Gun
- (1) 24″ 1×3 Board
- (1) 24″ 1×6 Board
- (1) 24″ 1×4 Board
- 2 1/2 inch construction screws
- Stain (sponges or cloth to apply stain)
- Wood Glue
- Orbital Sander/Sand paper (optional)
- Tack Cloth
Construction
*Side Note: These were made prior to starting our blog, so we didn’t take any pictures during the building process!
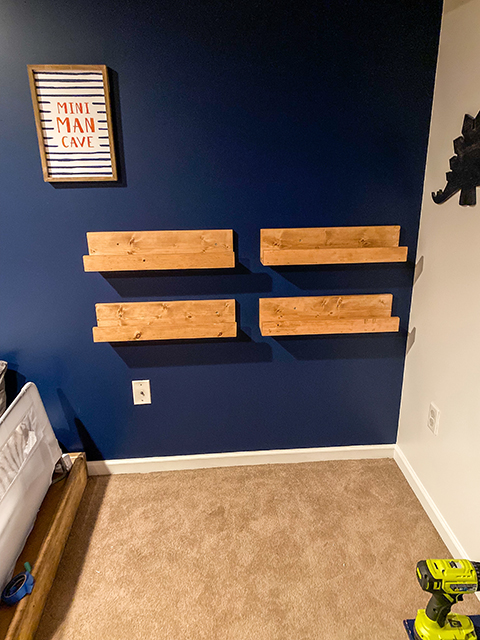
Once you have all of your tools and supplies the first step is to measure out your boards. The length of the boards is a personal preference, but they all need to be the same length. We chose to make the shelves 24″ wide because this made sense for the room and it allowed us to secure in two studs. Once you measure make a clean cut on each of the three boards (1×6, 1×3, and 1×4) using a miter saw.
Next, I sanded all of the edges, and the faces of the boards and wiped them down with tack cloth. Once the boards are clean you can take a sponge or old rag and apply the stain of your choice. Apply as many coats as you need to get the desired look. We went with Early American to match the rest of Graham’s room.
After you have applied all of the necessary coats of stain and it has dried you can move onto assembling the shelves.
Putting Everything Together
Take the 1×6 board and lay it flat on your table, then take your 1×4 board and apply a thin line of wood glue to the side that will attach to the 1×6 board (this step is optional) and attach perpendicular to the the 1×6 board. Use a damp cloth to wipe away any excess glue and then clamp the pieces together while the glue dries. Once dried, use construction screws to reinforce the base. Make a small pilot hole on the back of the 1×6 where you want to place the screw. How many screws depends on how long the boards are. We used 3 screws for 24″.
Apply a thin line of wood glue to the uncovered short side of the 1×4 board and apply the 1×3 board perpendicular to this board. Again, use a damp cloth to wipe away any excess glue and apply clamps while the glue dries. Once the glue is dried use the Brad Nailer to nail the 1×3 to the 1×4 base for added support.
The last step is to use the construction screws to anchor the shelves to the wall. Make sure you get at least one side screwed into a joist, otherwise the shelves may fall off the wall, if there are too many books.
Perfect For a Reading Nook