
Honestly, I love doormats! They are a super easy way to change your outside decor and a great way to express your personal style. I normally buy doormats at the store that already have designs on them, but I couldn’t find any that I wanted for the transition from spring to summer. I saw the most adorable daisy doormat on my Pinterest, but it was more than I was willing to spend. I closed out of Pinterest and couldn’t stop thinking about that daisy doormat…
This post contains affiliate links. If you choose to purchase after clicking a link, we may receive a commission at no extra cost to you.
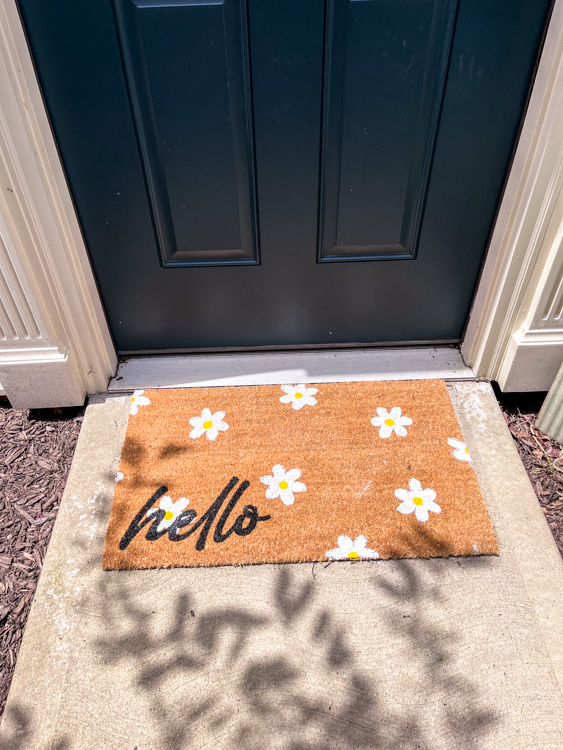
DIY Doormat Ahead
I needed that doormat, so I decided to make my own!!
Step 1: Decide on design
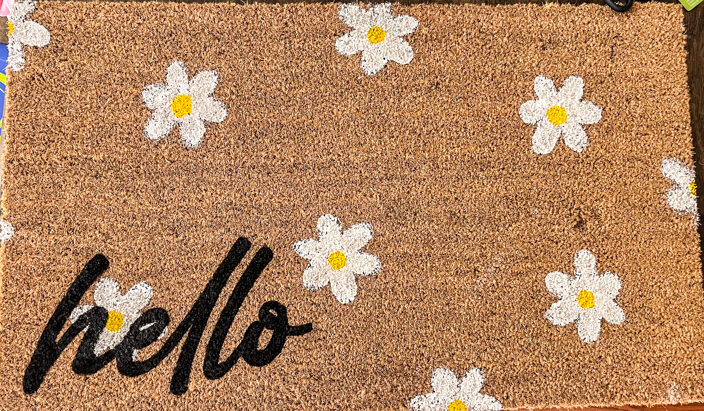
I knew I wanted daisies, but you can make anything you want! I’m already thinking about a pumpkin mat for fall, and maybe snowflakes for the winter. Once you have a design in mind, it will help with purchasing the right paint colors.
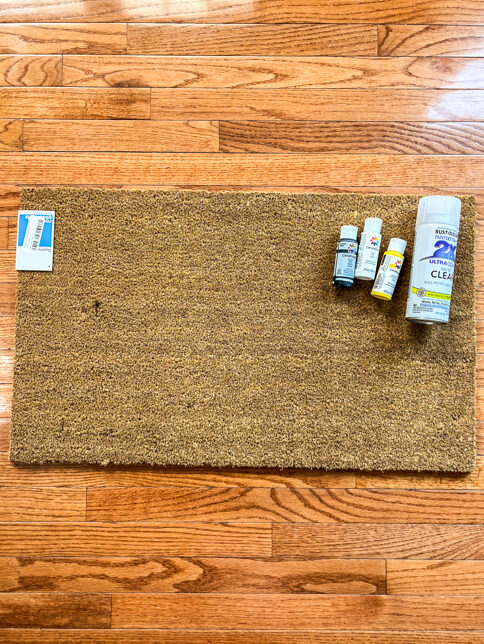
Step 2: Purchase supplies
Acrylic Paints
Paint Brushes
Stencil (or you can make your own, that’s what I did)
Optional Step 3: Make stencils
I have a Cricut, so I used that to make my stencil. I know people will typically use a plastic material or even vinyl, but I just used a heavy piece of card stock. I made one size daisy and the word Hello. What is great about making your own stencil, is you can make the exact size that you want.
Step 4: Paint
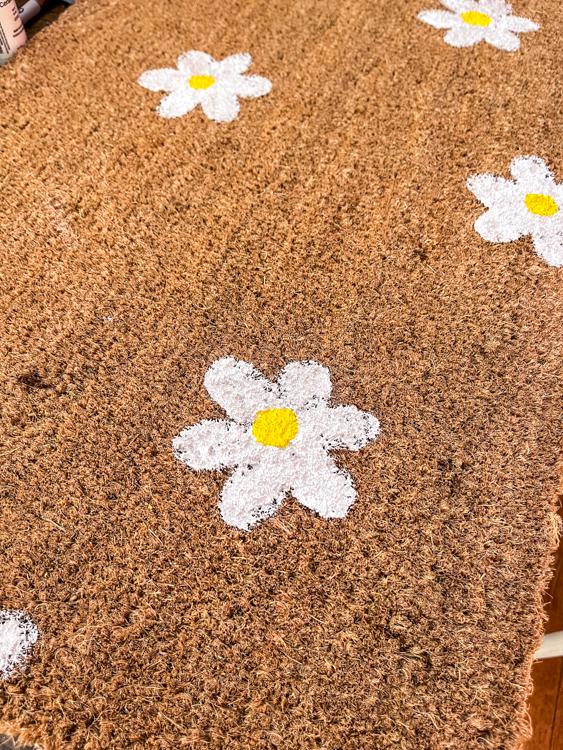
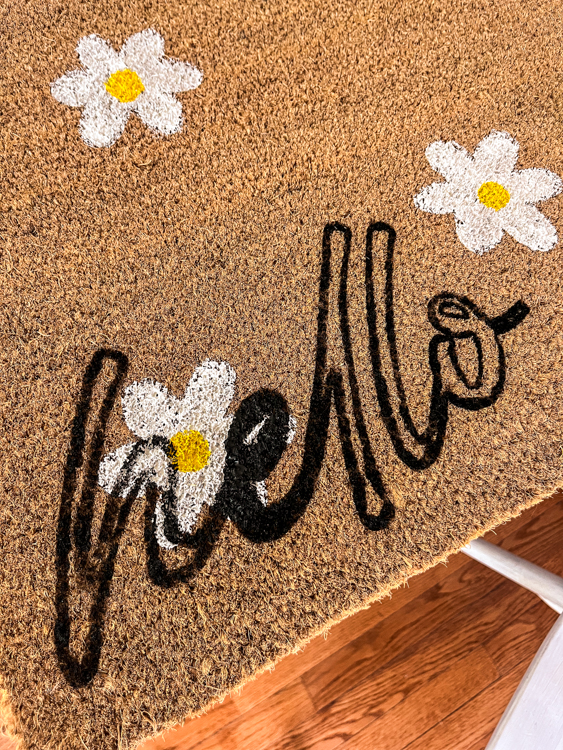
This part was honestly a bit of trial and error for me. This was my first time making a doormat, so I didn’t realize how much paint I was going to have to use! If you use a mat with coir fibers like I did, you will need a lot of paint for each section or you will get some “holes” in your images.
First, I figured out where I wanted each daisy to be. Once I figured out the placement, we got to work. I dabbed the paint over each stencil, and we just held it down as we went. Make sure not to swipe too much, or the paint may end up under the stencil.
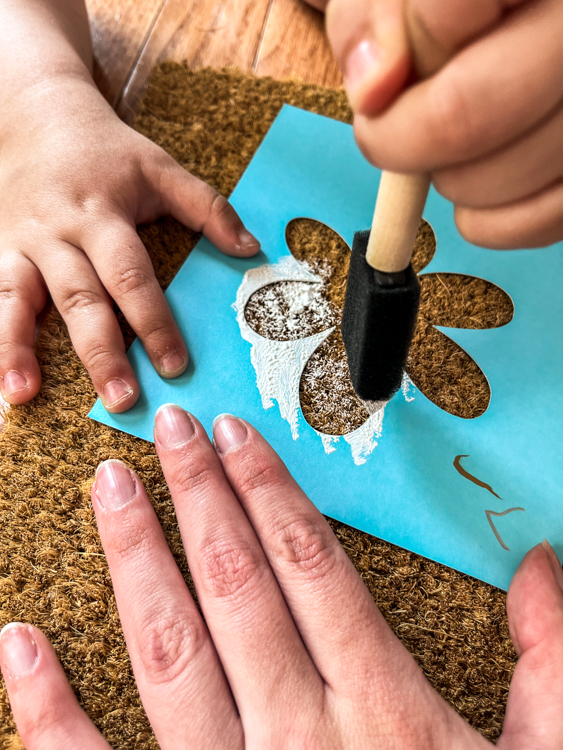

Because I chose a flower design, I let the white of the flower dry before going in and adding the yellow.
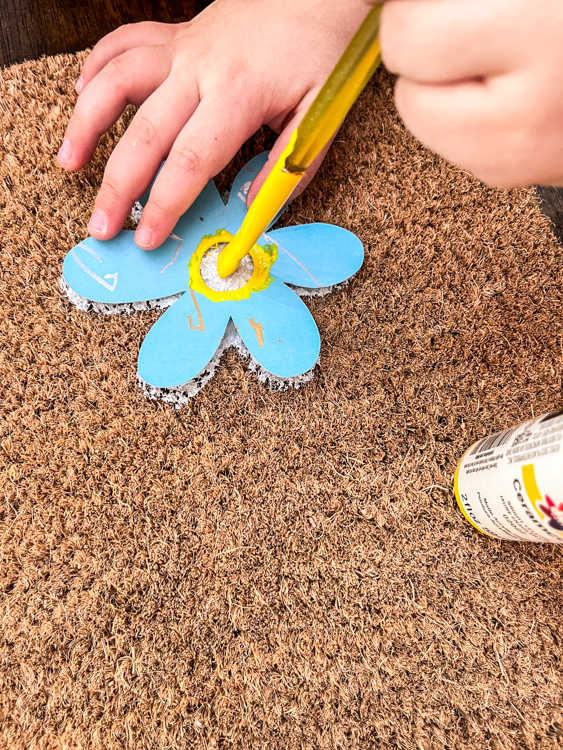
Again, I let the yellow fully dry before I went in and added the word Hello.
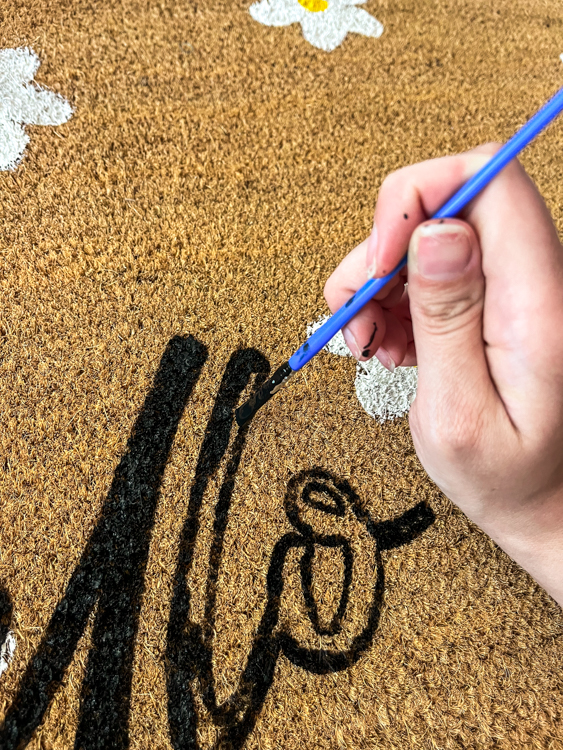
For the word Hello, the stencil was larger, so I found it was easier to do the outline of the word with the stencil down, and then I took off the stencil to fill it in.
Step 5: Clear Coat
Because my doormat was going to be outside, I wanted an extra layer of protection. Once all the paint was fully dry, I did two coats of the clear protective spray following the directions on the can.
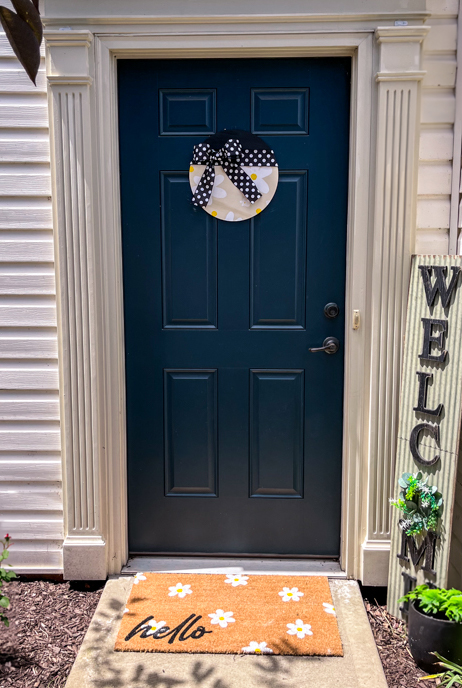
Step 6: Find the perfect spot
We put ours at our front door and I love it!!
How does it hold up?
I wanted to make sure the mat was holding up nicely before posting! We have had our mat outside for about a month now. We have had some pretty bad weather the last week or two, but aside from the white looking a little dirty there are no issues with the paint!!
Check out our DIY section for more projects