
We were on a hunt to get Graham new furniture for his toddler room, on a budget! It was so crazy to see the price of a brand new dresser and we could not find one that we really liked. We had already made Graham a floor bed, and I knew I wanted the dresser to match. I decided the best thing to do, would be to reface one with the same stain as his bed. I honestly, hated the idea of buying something new, just to reface it, so I took to the internet. I looked on Facebook Marketplace, Ebay, and Craigslist. They were either not what I was looking for, or more than I was willing to pay.
One night, we were over my in-laws and we told them about our hunt for a new dresser. They told us that they had one in the basement that they were not using. It was exactly what we were looking for, so they gifted it to us!
It was just an IKEA dresser, but I was surprised at the quality and that it was real wood! Thank goodness it was real wood, because that meant we could sand off the existing stain and stain it to match Graham’s bed.
The process to refinish the dresser was time consuming, but it was easy and required minimal tools.
The Process
Step 1 – Sanding
We used sand paper and an orbital sander. The orbital sander was great for the large surfaces and big blemishes. Plus, it made it so much faster! We could not figure out how to remove the dressers (would have made things easier) so we used the sand paper to get in between the drawers.

Step 2 – Clean the dust
You want to make sure all the dust from sanding is removed. First, we used a leaf blower to get the loose particles. Then we went in with a tack cloth to make sure we got the remaining dust.
Step 3 – Stain
We used . We used a stain sponge to apply it to the whole surface. We applied two coats. You can use as many as you like to get the desired color. Make sure to read the directions on your stains for drying times between coats and total drying time.
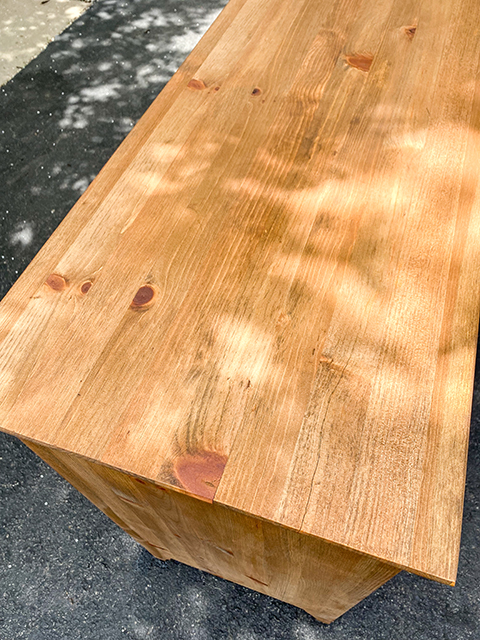
Step 4 – Add a Finish
We chose to add a finish, because we knew the dresser would get daily use. Again, check the label on your finish for recommended application and drying times.
Step 5 – Replace Hardware
We decided to add new hardware, but you can stain or paint the old hardware as well. We found a few options at The Home Depot and let Graham choose which ones he wanted.
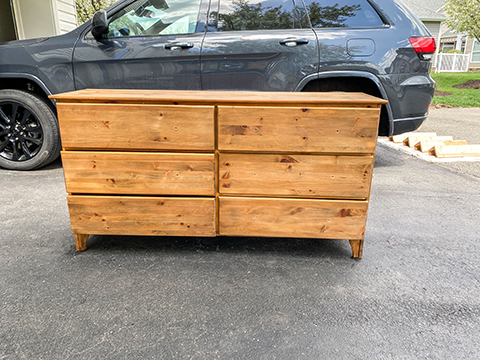
End Result
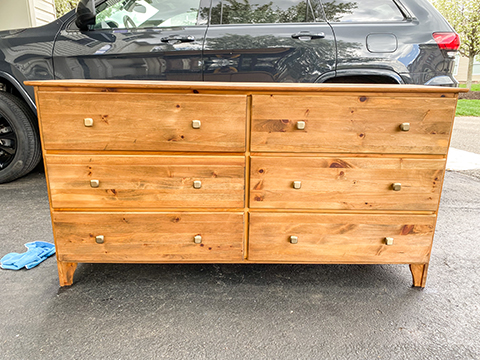
The hardest part of the whole process, was waiting for things to dry! While this is a simple project, it will require more than one day to complete as the drying time is needed to make sure everything looks the way that you want it to, and it lasts!
We are very happy with the end result, and will definitely refinish other pieces.